SvelteとJavaScriptを使用してシンプルで動的なツールチップを作成する
出版日: 2024年6月19日
背景
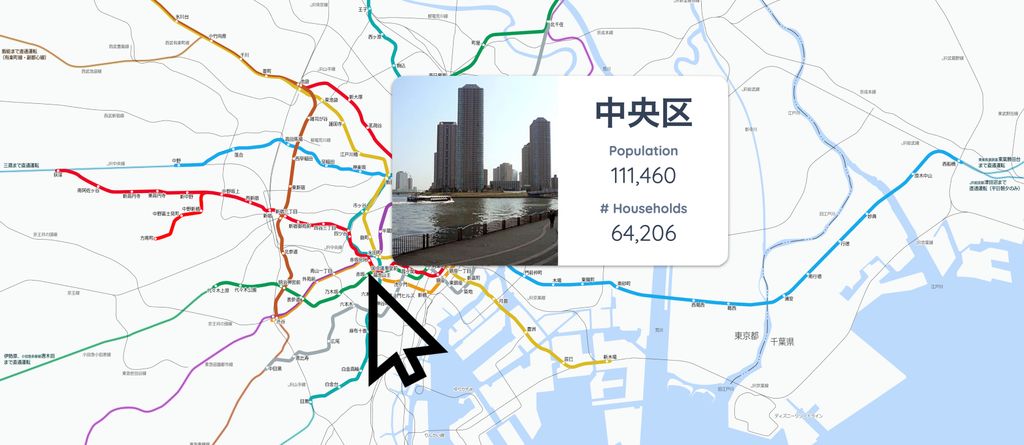
ウェブページにすべての情報を表示できない場合、ツールチップを使用して追加情報を必要に応じて表示するのが便利です。
このような情報ボタンがあります:
情報ボタンにホバーすると、表示される情報が見えます
情報ボタンにホバーすると情報が表示されることがわかります。ホバーすると情報が利用可能になります。
では、JavaScriptとSvelteを使用してツールチップを作成する方法を見てみましょう。
目的
このブログ記事では、JavaScriptとSvelteを使用して、マウスの位置に応じて位置が調整される最小限の動的ツールチップを作成します。
ツールチップはHTMLもサポートする必要があります。ツールチップ内にタイトルや画像などのリッチコンテンツを表示したいからです。
方法
まず、ホバー時にツールチップを表示したい要素を追加します:
<Info size={50} color="#0ea5e9" />現在、このボタンは機能していません。では、ツールチップを有効にするためのバックエンドを開発しましょう:
<script>
// OnMount is needed to find all tooltips once the component is mounted
import { onMount } from 'svelte';

// info: the tooltip DOM element (info window)
// container: main container  DOM element in the page
// innerWidth: window innerWidth. Use to calculate the location of info window
// innerHeight: window innerHeight. Use to calculate the location of info window
let info, container, innerWidth, innerHeight;

// showInfo: Used to control whether to show an info
$: showInfo = false;

// Function that controls the location of tooltip based on mouse location
function handleMouseMove(event) {

	// Get mouse location
	let x = event.clientX;
	let y = event.clientY;

	// Get container location
	let rect = container.getBoundingClientRect();

	// If mouse is in the top half of the screen, set its 'top' style, otherwise none
	info.style.top = y < innerHeight / 2 ? y - rect.top + 10 + 'px' : '';

	// If mouse is in the bottom half of the screen, set its 'bottom' style, otherwise none
	info.style.bottom = y < innerHeight / 2 ? '' : rect.bottom - y + 10 + 'px';

	// If mouse is in the left half of the screen, set its 'left' style, otherwise none
	info.style.left = x < innerWidth / 2 ? x - rect.left + 10 + 'px' : '';

	// If mouse is in the left right of the screen, set its 'right' style, otherwise none
	info.style.right = x < innerWidth / 2 ? '' : rect.right - x + 10 + 'px';
}

onMount(() => {

	// Get all elements which require showing a tooltip when hovered
	let tooltips = document.querySelectorAll('[tooltip]');

	for (const element of Array.from(tooltips)) {

		// When hovered, show tooltip
		element.addEventListener('mouseenter', () => {
			showInfo = true;
			info.innerHTML = element.getAttribute('tooltip');
		});

		// When hover is gone, hide the tooltip element
		element.addEventListener('mouseleave', () => {
			showInfo = false;
			info.innerHTML = '';
		});
	}
});

</script>

// Get innerWidth and  innerHeight by binding to window
// Listen to mousemove on the window
<svelte:window bind:innerWidth bind:innerHeight on:mousemove={(e) => handleMouseMove(e)} />

// Overall Container. Bind to container variable.
// This is used to adjust the location of tooltip
<div class="flex gap-4 flex-col relative" bind:this={container}>

	<!-- Tooltip element. It's contents are only assigned when the user hovers over an info button -->
		<div bind:this={info}
		class={`z-50 bg-white px-4  max-w-[500px] py-2 flex absolute rounded overflow-hidden shadow-xl hidden`}></div>

	<!-- Info button. This triggers the tooltip -->
	<div class="inline-block"
		tooltip="<p class='font-bold'>Thanks for checking out this tooltip. Much appreciated.</p>">
		<Info size={50} color="#0ea5e9" />
	</div>
</div>
長いコードで、そのほとんどはボイラープレートですので、コードの3つの重要な部分に焦点を当てたいと思います。
1. 情報要素
情報要素はツールチップをトリガーする要素です。私たちの例では、情報ボタンでした。
これらの要素にはtooltip属性が必要です。この属性の値は、この要素にホバーしたときにツールチップ内に表示したいHTML要素でなければなりません。
// Info button. This triggers the tooltip
<div class="inline-block"
	tooltip="<p class='font-bold'>Thanks for checking out this tooltip. Much appreciated.</p>">
	<Info size={50} color="#0ea5e9" />
</div>
2. イベントリスナー
すべての情報要素にtooltip属性を割り当てると、コンポーネントがマウントされたときにそれらを識別するのに役立ちます。
ツールチップ属性を持つすべての要素が識別されると、mouseenterイベントをリッスンし、ツールチップを表示します。このイベントはまた、ツールチップ属性の値をツールチップのHTMLに割り当てます。
マウスが情報要素を離れると、ツールチップは非表示にする必要があります。
ツールチップの可視性を制御する方法は次のとおりです:
onMount(() => {

	// Get all elements which require showing a tooltip when hovered
	let tooltips = document.querySelectorAll('[tooltip]');

	for (const element of Array.from(tooltips)) {

		// When hovered, show tooltip
		element.addEventListener('mouseenter', () => {
			showInfo = true;
			info.innerHTML = element.getAttribute('tooltip');
		});

		// When hover is gone, hide the tooltip element
		element.addEventListener('mouseleave', () => {
			showInfo = false;
			info.innerHTML = '';
		});
	}
});
3. ツールチップの位置決め
情報要素にホバーしたときにツールチップを表示/非表示にできるようになったので、次はツールチップの位置を決定する必要があります。
以下のコードはそれを実現するためのものです:
// Function that controls the location of tooltip based on mouse location
function handleMouseMove(event) {

	// Get mouse location
	let x = event.clientX;
	let y = event.clientY;

	// Get container location
	let rect = container.getBoundingClientRect();

	// If mouse is in the top half of the screen, set its 'top' style, otherwise none
	info.style.top = y < innerHeight / 2 ? y - rect.top + 10 + 'px' : '';

	// If mouse is in the bottom half of the screen, set its 'bottom' style, otherwise none
	info.style.bottom = y < innerHeight / 2 ? '' : rect.bottom - y + 10 + 'px';

	// If mouse is in the left half of the screen, set its 'left' style, otherwise none
	info.style.left = x < innerWidth / 2 ? x - rect.left + 10 + 'px' : '';

	// If mouse is in the left right of the screen, set its 'right' style, otherwise none
	info.style.right = x < innerWidth / 2 ? '' : rect.right - x + 10 + 'px';
}
上記のコードは賢明で、画面を4つの象限に分割し、それに応じてツールチップを表示するため、画面からはみ出さないようにします。
以下の象限にホバーして、実際にどのように機能するかを見てみましょう:
情報要素の位置に応じて、ツールチップが賢明に配置されることがわかります。うまくいきますよね?
結論
このブログ記事では、SvelteとJavaScriptを使用してツールチップを開発しました。
私たちのソリューションでは、ツールチップを表示したい要素にtooltip属性を追加するだけで済みます。この属性の値はツールチップに表示されます。
私たちのソリューションはHTMLを受け入れ、ツールチップが画面からはみ出さないように賢く配置されます。
質問がありますか?以下にお知らせください。
それでは、ハッキングを楽しんでください!
このブログは英語からChatGPTによって翻訳されました。不明な点がある場合は、お問い合わせページからご連絡ください。
コメントを残す
コメント
現在コメントがありません。
その他のブログ
2024/06/17
JavaScriptを用いて東京都のインタラクティブな地図を作成する

2024/06/14
Matplotlibで日本語文字化けを解決できる簡単な方法

2024/06/13
書評 | トーキング・トゥ・ストレンジャーズ 「よく知らない人」について私たちが知っておくべきこと by マルコム・グラッドウェル

2024/06/07
日本語で最もよく使われる3000字の漢字

2024/06/07
VSCodeでRegexを使用してReplaceする方法
2024/06/06
SvelteではReadable Storeを使用するな
2024/06/05
GzipとPakoでデータを圧縮してWebサイトのローディング速度を上げる方法
2024/05/31
JavaScriptを使用してWebページ上でマウスが指している単語を特定する

2024/05/29
SvelteとSVGを用いてインタラクティブな地図を作成する

2024/05/28
書評 | Originals 誰もが「人と違うこと」ができる時代 by アダム・グラント & シェリル・サンドバーグ
2024/05/27
Javascriptを使用して数独を解く方法

2024/05/26
ウェブサイトへのトラフィックを1か月で10倍に増やした方法
2024/05/24
人生はサイクリングに似ている
2024/05/19
JavaScriptでバックトラッキング・アルゴリズムを用いて完全な数独グリッドを生成する

2024/05/16
Tailwindが素晴らしい理由とWeb開発をいかに楽にするか

2024/05/15
PythonとGitフックを使用してサイトマップを自動的に生成する

2024/05/14
書評 | Range (レンジ) 知識の「幅」が最強の武器になる by デイビッド・エプスタイン
2024/05/13
SvelteとSvelteKitはなんですか?
2024/05/12
SvelteKitで国際化(多言語化)

2024/05/11
SvelteでCachingを用いてDeploy時間を短縮する方法

2024/05/10
SvelteとIntersection Oberverによるレイジーローディング

2024/05/10
遺伝的アルゴリズムで最適な株式ポートフォリオを作る方法
2024/05/09
Pythonを用いてShapeFileをSVGに変換できる方法
2024/05/08
Svelteの反応性:変数、バインディング、およびキー関数

2024/05/07
書評 | 孫子の兵法

2024/05/06
スペシャリストは終了。ゼネラリスト万歳!

2024/05/03
トルコ人の有権者の投票行動をPythonでの分析
2024/05/01
Seleniumを用いてトルコ投票データベースを作る方法
2024/04/30
SvelteとTailwindを使用してInfinite Scrollできる方法

2024/04/29
1年間以内で日本語を駆使できるようになるための方法
2024/04/25
SvelteとTailwindを用いたWebサイトテンプレート

2024/01/29
怠惰なエンジニアとひどいデザイン

2024/01/28
偉大さについて
2024/01/28
MacBook で PDF を PNG に変換する

2023/12/31
2023年振り返り:24冊の読んだ本のまとめ

2023/12/30
Python PILを使用して写真コラージュを作成する方法

2024/01/09
ウェブサイトの訪問者のデバイスとブラウザを検出する方法

2024/01/19
ChatGPT回答の解析
